This tutorial was written by a WWI group owner and, if there is any similarity or resemblance to any other tutorial, then that is purely a coincidence.
MATERIAL
A suitable tube – I have permission to use the work of ShakilovNeel HERE
SwayWordArtAnimationCG.mng HERE
Font used : Scrap Cursive
PLUGINS
Simple – Diamonds & Pizza Slice Mirror
MuRa’s Meister – Perspective Tiling
Eye Candy 5 Impact– Perspective Shadow
Eye Candy 5 Texture – Texture Noise
MuRa’s Meister – Perspective Tiling
Eye Candy 5 Impact– Perspective Shadow
Eye Candy 5 Texture – Texture Noise
Choose a foreground colour from your tube – I used #f60838
Choose a background colour from your tube – I used #06243b
Choose a background colour from your tube – I used #06243b
Open a New Transparent Image 700 x 550
Make a foreground / background gradient Radial / Settings below
Flood Fill your image with the gradient
Effects / Plugins / Simple / Diamonds
Effects / Image Effects / Seamless Tiling / Default
Effects / Plugins / Simple / Pizza Slice Mirror
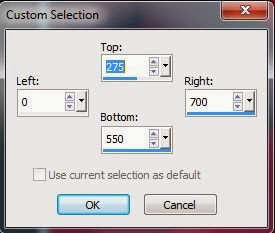
Activate your Selection Tool Set on Rectangle
Made a Custom Selection as follows
Effects / Plugins / MuRa’s Meister / Perspective Tiling / Default Setting
Repeat the Perspective Tiling
Promote the Selection to Layer
Selections / Select None
Repeat the Perspective Tiling
Promote the Selection to Layer
Selections / Select None
Effects / 3D Effects / Drop Shadow –4 / 4 /75 / 35 / Black
Repeat the Drop Shadow with the same settings
Activate your bottom Background layer
Using your Freehand Selection Tool / Lasso set on Point to Point make a selection as shown
Using your Freehand Selection Tool / Lasso set on Point to Point make a selection as shown
Promote the Selection to Layer
Selections / Select None
Apply the same Drop Shadow twice
Selections / Select None
Apply the same Drop Shadow twice
Activate your top layer
Copy your tube and Paste as a New Layer
Resize as necessary – I resized mine by 75%
Copy your tube and Paste as a New Layer
Resize as necessary – I resized mine by 75%
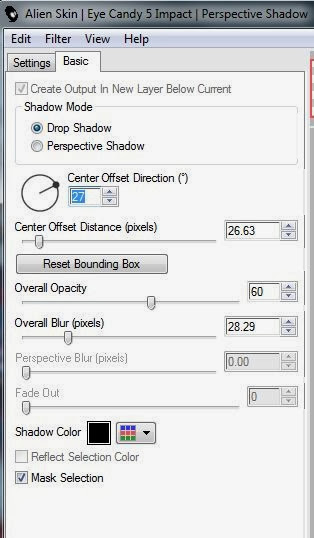
Eye Candy 5 / impact / Perspective Shadow / Settings as below
Duplicate your Promoted Selections with the triangles layer twice to make 3 layers in all
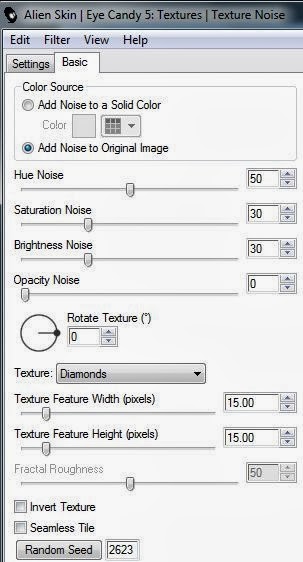
On the top Layer – Effects / Plugins / Eye Candy 5 Textures / Settings as below
Close the eye of this layer
Activate the layer below and Apply the Eye Candy 5 Textures with the same settings but press the Random Seed button
Activate the layer below and Apply the Eye Candy 5 Textures with the same settings but press the Random Seed button
Close the eye of this layer
Activate the bottom layers of triangles and Apply the Eye Candy 5 Textures with the same settings but press the Random Seed button
Leave the eye of this layer open
Activate your top layer
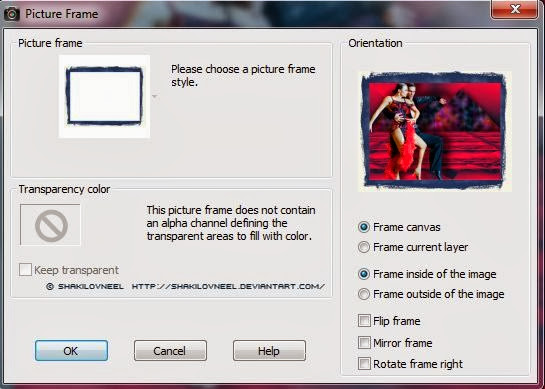
Image / Picture Frame / Cyanotype / (Corel-09.051 Picture Frame) / Settings below
Effects / 3D Effects / Drop Shadow
-4 / 4 / 75 / 35 / Black
Repeat but change the Vertical and Horizontal to 4 / –4
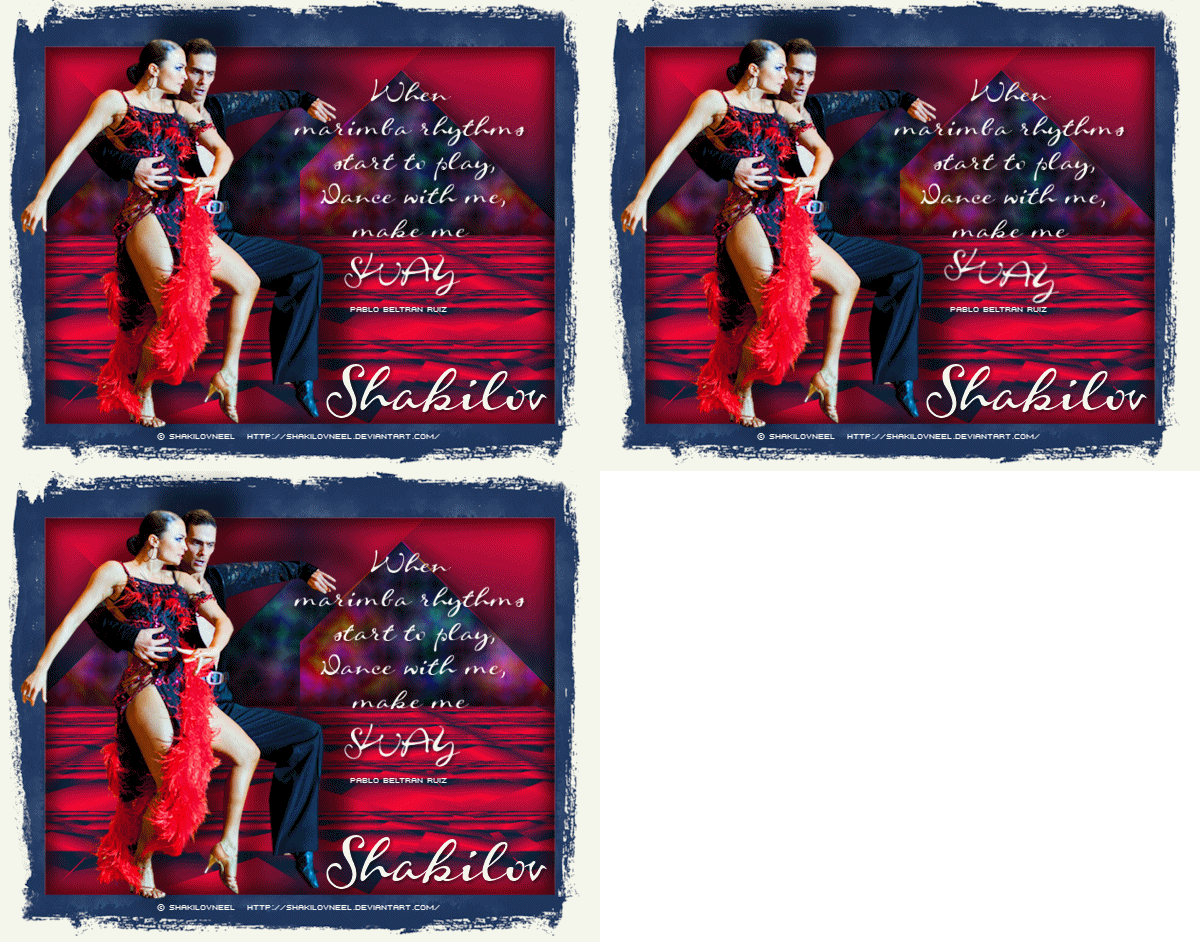
Now bring your tube layer up to the top and move the tube left and so that it appears they are about to step out of the frame
Image / Resize / Resize all layers checked / Resize to 600 pixels wide
Add your artist’s copyright and licence # if applicable
Add your name in a pretty font – I used Scrap Cursive
Place at the bottom right corner
Place at the bottom right corner
If you do not intend to animate add your chosen text and you can finish here
ANIMATION
If you are using your own text add it now and add Drop Shadow 2 / 2 / 62 / 5 / Black
If you are using my animated text then carry on here – we will add the animated text later
Copy Merged and take into Animation Shop and Paste as a New Animation
Return to PSP
Return to PSP
Close the eye of the bottom Triangle layer and open the eye of the middle layer
Copy Merged and take into Animation Shop
Click on Frame 1 and Paste after the Current Frame
Return to PSP
Copy Merged and take into Animation Shop
Click on Frame 1 and Paste after the Current Frame
Return to PSP
Close the eye of the middle triangle layer and open the eye of the top triangle layer
Copy Merged and take into Animation Shop
Click on Frame 2 and Paste after the Current Frame
Copy Merged and take into Animation Shop
Click on Frame 2 and Paste after the Current Frame
Open the SwayWordArtAnimationCG.mng
Edit / Select All and Edit / Select All on your tag animation
Slide over the word art from Frame 1 to Frame 1 of your tag and place in position
Edit / Select All and Edit / Select All on your tag animation
Slide over the word art from Frame 1 to Frame 1 of your tag and place in position
Edit / Select All
Animation / Frame Properties / Set to 50
Save !
Animation / Frame Properties / Set to 50
Save !


No comments:
Post a Comment
Note: only a member of this blog may post a comment.