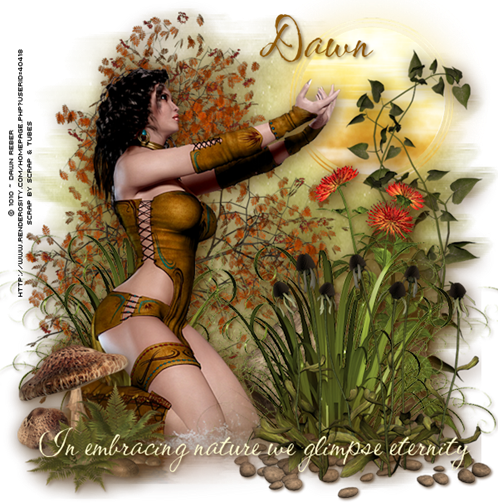
This tutorial was written by a WWI group owner and, if there is any similarity or resemblance to any other tutorial, then that is purely a coincidence.
MATERIAL
I have permission to use the work of 1010 ~ Dawn Reber HERE
Scrap kit – Mysterious Forest FTU from Scrap & Tubes HERE
WSL_Mask260 HERE
Font used CAC Shishoni Brush
Open an New Transparent Raster Image 700 x 700
Open a New Raster Layer
Selections / Select All
Open your Mysterious Forest Paper 1 and Copy and Paste into the Selection
Selections / Select None
Selections / Select All
Open your Mysterious Forest Paper 1 and Copy and Paste into the Selection
Selections / Select None
Layers / New Mask Layer / From Image / Find your WSL_Mask55 and Press OK
Merge / Merge Group
Rename this layer Mask
Merge / Merge Group
Rename this layer Mask
With your Ellipse Tool set on Circle
Set your Foreground Colour to Null and your Background Colour to #ffffff
Draw a circle slightly smaller than the central circle in your Mask layer
Move this layer down under the Mask layer
Layers / Merge / Merge Down
Image / Resize / Resize All Layers unchecked / Resize 45%
Use your Raster Deform / Pick Tool and on your Tool Options Bar
Set position X to 410 and Position Y to 49
Duplicate this layer
Activate the lower layer
Adjust / Blur / Gaussian Blur / 25
Activate the next layer up and Layers / Merge / Merge Down
Duplicate this layer and set the Blend Mode to Hard Light
Copy your tube and Paste as a New Layer
Resize – I resized mine by 70%
Move down and to the left – see my example for guidance
Effects / 3D Effects / Drop Shadow 4 / 4 / 75 / 35 / #422200
From your Mysterious Forest Scrap Kit copy the following elements and resize as listed
Add Drop Shadow to each layer
as above
Element 9 – Resize 85% Drag Layer Beneath Tube layer and position as in example
Element 6 – Resize 90% Position on the right hand side
Element 8 – 100% – Position on the right over the bottom of Element 6
Element 11 – Resize 70% Position in bottom Left Hand Corner moving this layer up over your tube
Element 18 – 100% – Position on right but under your Element 6 layer
Duplicate this layer and Resize the Duplicate by 85%, place behind your tube
Duplicate this layer and Resize the Duplicate by 85%, place behind your tube
Element 19 – 100% Position on Right under Raster Layer 8
Element 20 – 100% – Place as in my example
Element 26 – 100% – Place as in my example
Element 33 – Resize 60% – Drop Shadow 2 / 2 / 62 / 5 / Colour #422200 Place at the bottom right
Activate your Raster 1 layer
Selections / Select All
Copy Paper 2 from your Mysterious Forest Scrap Kit and Paste into Selection
Selection / Select None
Layers / New Mask Layer / From Image / Find your WSL_Mask260
Merge / Merge Group
Selections / Select All
Copy Paper 2 from your Mysterious Forest Scrap Kit and Paste into Selection
Selection / Select None
Layers / New Mask Layer / From Image / Find your WSL_Mask260
Merge / Merge Group
Image / Resize / Resize all Layers checked / Resize to 600 wide
Add your artist’s copyright information and your licence# if applicable
Add a credit for the Scrap Kit e.g. Scrap by Scrap & Tubes
Add a credit for the Scrap Kit e.g. Scrap by Scrap & Tubes
Now Add your name in a pretty font with some drop shadow and any word art you choose and your tag is finished!
You can add a background of white or just save as a png as it is

No comments:
Post a Comment
Note: only a member of this blog may post a comment.